

A Customizable Navbar For React
How I developed a library that allows you to build a powerful & sophisticated navigation bar in your React app.


Introduction
I have been consulting in web and mobile development for more than 10 years now. I have contributed to the development of literally hundreds of websites and mobile apps. One component, which I had to include in each and every one of them, was the navigation bar!
I have used almost all popular frameworks in my work so far. Bootstrap, Material and Ant design are the frameworks that I have used the most. All of these frameworks did provide a responsive navigation bar, but frankly it was very basic in nature. Every project brought in some or the other custom requirement, and customizing the boilerplate navigation bars according to those requirements, did take up some time and effort.
Hence, I decided to attempt to build a navigation bar, that is both powerful and easy to customize. Motivation of this article is to pen down the beginning, the journey and the end result.
Requirements
Initially, I spent some time figuring out the requirements. There was some back and forth, but I finalized some broad level requirements as follows. The navigation bar should:
- Be responsive, should appear nice on bigger screens as well as smaller screens.
- Be customizable, should be capable of blending seamlessly in any UI design.
- Be extendible, should be capable of accommodating developer defined custom components.
- Be dynamic, should allow dynamic updation of menus, images, buttons, etc.
- Be reusable, should be usable by anybody and everybody, easily.
- Be state-aware, should seamlessly handle non-registered, registered and subscribed user states.
Development
Project Setup
Language
Typescript was my natural choice.
Distribution
Since I wanted to build and open source the library for everybody to use, I chose NPM as the distribution channel.
Source Control
I started with a fresh Github repository. Using the create-react-library tool, I setup the library on my machine and then connected it to the GitHub repo.
Deployment Setup
For deployment I ended up creating a micro CI / CD pipeline from my machine to the NPM repository. GitHub actions helped.
First Action
Triggered on - push to main branch
Function - to executes a run of the unit tests
Second Action
Triggered on - release creation on GitHub
Function - to publish the release code to NPM
Methodology
I followed the following methodology:
- Write new code
- Write unit tests for the new code
- Ensure the new code doesn't break the previous code
- Achieve 100 percent line coverage
- Push to Git
- Again write new code....
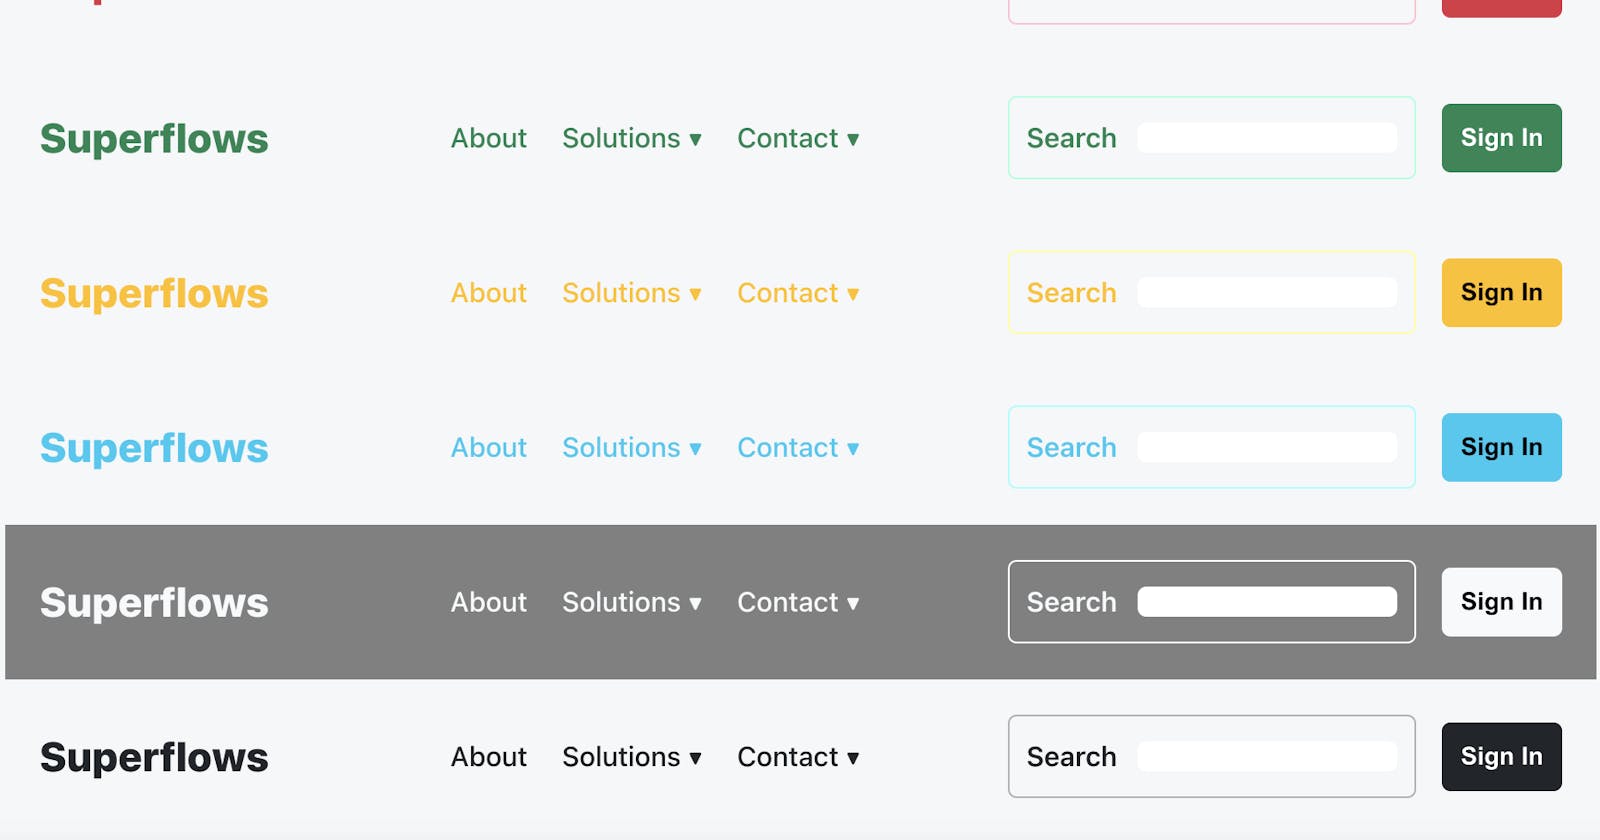
Development of the Navigation bar
The navigation bar was designed to comprise of the following sub-components:
Brand


This sub-component was designed to represent the brand information, particularly the image and the name.
Customizable attributes via props
- Brand image url
- Brand name
- Visibility
Menu


This sub-component was designed for the main menu.
Customizable attributes via props
- Menu and submenu (via JSON array)
Search


This sub-component was designed for the search input in the navigation bar.
Customizable attributes via props
- Search Label
- Search Icon
- Visibility
Sign In


This sub-component was designed to handle the sign in button.
Customizable attributes via props
- Button caption
- Visibility
User Profile
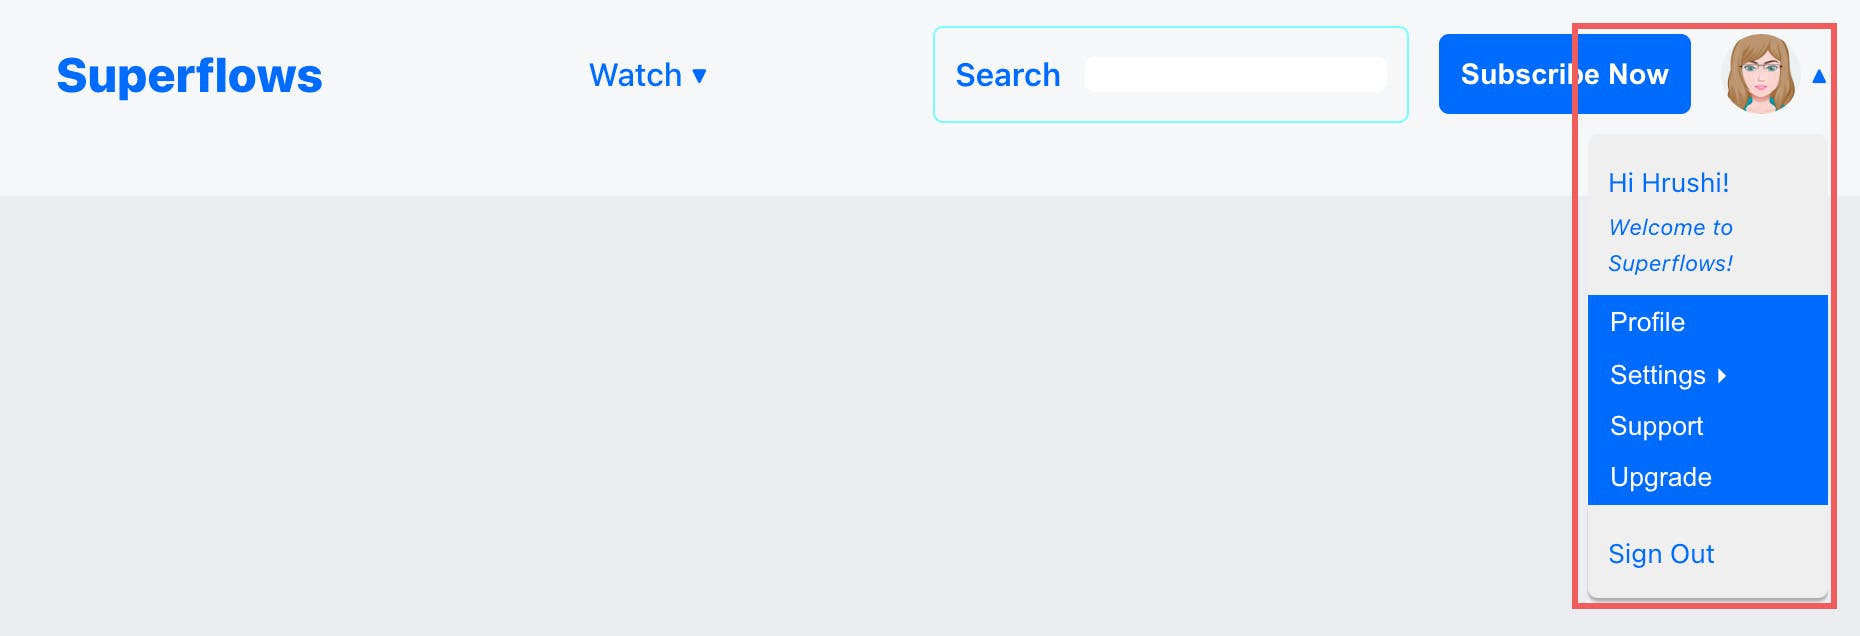

This component was designed the represent the profile of the signed in user and the secondary menu.
Customizable attributes via props
- Profile Picture
- Secondary menu and Submenu
Extending the User Profile Container
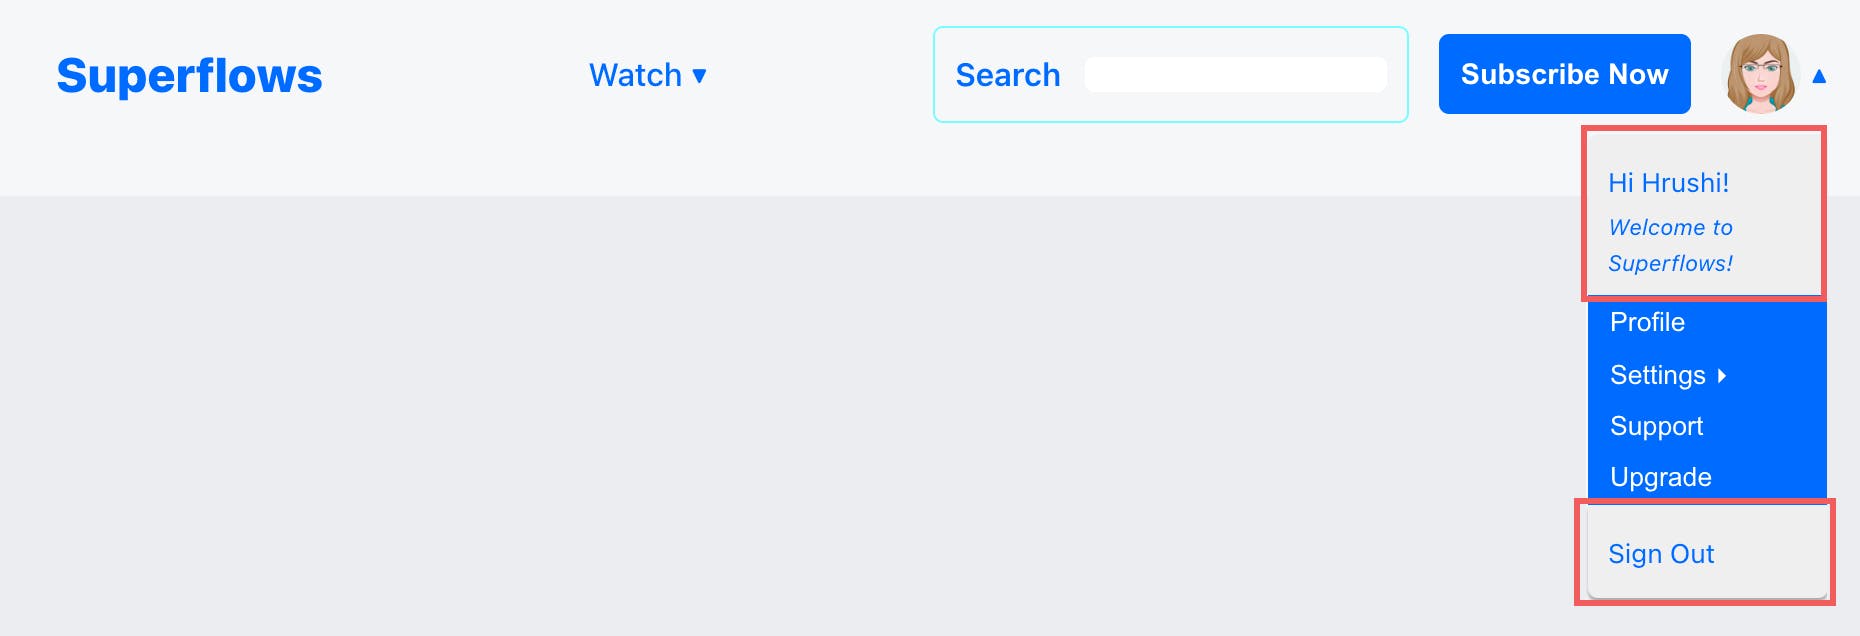
Interesting point to mention here, is that the user profile component was made extendible. Meaning, I decided to earmark two locations, where the developers would be allowed to inject their custom developed components, as per their requirement.
Advanced Customization
I also decided to support further customization using two methods:
- Inline CSS
- Classnames
All the sub-components mentioned above were designed to accept inline CSS and className inputs as props. Inline CSS via a standard JSON object and classNames as strings.
Testing & Release
I followed the Test-Driven-Development (TDD) approach, so I was simultaneously writing unit tests as I was finishing up new features. At each juncture, I ensured that the Unit tests covered 100 percent lines of code.
Once all the functionality was in and the tests passed, I released it on NPM. Iterated on it for a while until most bugs were ironed out and improvements were accommodated in.
Parting thoughts
Customizability and ease-of-use are always at loggerheads with each other. Balancing them is challenging!
I have tried to strike the best balance between the two, ultimately giving full control to the developer, for advanced usages. One important take-away is that since I was the only person developing this, TDD really helped me. It made sure that I was not breaking any previous functionality as I was writing new code.
I would highly recommend the Test-driven-development approach, particularly to anybody who is doing solo development.
For Further Information
Please visit this link for installation instructions, detailed docs and live demos.
I would be really thrilled if you could drop a line of feedback, if the navigation bar finds any use in your project. Also please feel free to get in touch with me if you need any help or for any feature request or for that matter anything, even to say hi!
About the author
Hrushi M is an entrepreneur by profession and software engineer by training. He has the experience of bootstrapping a software consulting company and leading as its CEO for more than a decade. He is currently the developer and maintainer of superflows.dev, a framework for developing cloud-based server-less applications.